The Voracious Resurgence | |
| Prime Weapons • Ultimate Weapons • Ultimate Augments • Abjurations iL119 • JSE Necks • Divergence Augments • Escutcheons | |
| Reforged Armor Artifact: +1 • iL109 • iL119/+2/+3 Relic: +1/+2 • iL109 • iL119/+2/+3 Empyrean: +1/+2 • iL109 • iL119/+2/+3 |
Guides • Crafting • Trusts • Apex Monsters |
Mandragora Mania 2021 Guide
|
|
|

Event Period
| Edition | Campaign Period |
|---|---|
| 2021 | Sunday, May 16, at 1:00 a.m. (PDT) to Monday, May 31, at 7:59 a.m. |
Getting Started
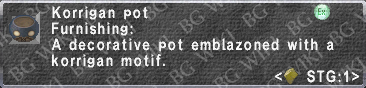
- Speak with one of the moogles in one of the following locations. Players will receive a Korrigan Pot and will be able to participate in Mandragora Mania.

- Southern San d'Oria (I-8)
- Bastok Markets (F-8)
- Windurst Waters (F-9)
- Speaking with Chacharoon in one of the following locations to participate.

- Southern San d'Oria (J-9)
- Bastok Markets (F-8)
- Windurst Waters (F-9)

Walkthrough
The Basics
The overall idea of the game is to score more points than your opponent. Be sure to look in the upper left corner of the screen to see the current score.

Mandragora Mania is similar to the real-world game of Mancala. The game board consists of eight hexagons. Your opponent controls three hexagons (the top row), and you control three hexagons (the bottom row). Both players share control of the middle (yellow) hexagons, meaning that both you and your opponent have a selection of five hexagons to work with. In the game menu, the five hexagons you control are numbered 1 through 5, from left to right, with #2 and #4 being the shared yellow hexagons. Each player also controls their "base", the large rectangle they stand on.
On a player's turn, they select one of the five hexagons they control. The mandragoras on that hexagon are then distributed to adjacent hexagons or base in a counter-clockwise order, one mandragora per hexagon. If the distribution puts a mandragora on a player's "base", then that player keeps the mandragora placed on their base, and gains points based on that type of mandragora. If the distribution would place a mandragora on the other player's base, it is skipped; it is not possible to place a mandragora on your opponent's base and give them points by accident. If the distribution ends exactly at a player's base, they get another turn.
It is not possible to select a hexagon with zero mandragora on it. The game ends when either you or your opponent cannot make a move (i.e., have zero mandragora on all five hexagons they control), and the player with the most points wins.
Each Mandragora is worth a different amount of points:
- 1 Point
- Normal Mandragoras
- 2 Points/3 Points
- Korrigans and Pachypodiums
- For the player who moves first in the game, they are worth 2 points. For the player who moves second, they are worth 3.
- Korrigans and Pachypodiums
- 3 Points/4 Points
- Citrullus and Adenium
- For the player who moves first in the game, they are worth 3 points. For the player who moves second, they are worth 4.
- Citrullus and Adenium
Even if you lose, you keep all Jingly you earn. If you quit the game, you lose all jingly earned so far that game. Before unlocking them, you are at first focusing on winning to unlock the higher tier prizes. If you have not unlocked everything, it may be advantageous to quit if you make a mistake early on so you save time.
There are a total of ten opponents to play against. The later opponents are tougher they are because they make smarter moves. Unlike last year, you must beat the highest opponent that you have unlocked in order to unlock the next. Every other "new" opponent beaten unlocks another "???" reward. See the table below for all rewards.
Strategy
It is random who goes first each game.
The idea of the game's strategy is to setup the board in a way that you can score multiple points per round. If you have a "perfect" score in a round by not "overscoring" and giving your opponent a mandragora on their blue tile closest to you, then you get to go again that round.
An example of a "Perfect" score: If you have 3 mandragoras in Area 3, you will want to choose that option. One mandragora will be added to Area 4, one to Area 5, and one to your platform and you will score. You will then get to go again. If you then have one mandragora in Area 5, pick that to score and go yet again that round! There is no limit to how many times you or your opponent can move in a round as long as you score each time. With this in mind, its best to setup the board in a way where you can score multiple times per round.
Focus on making the best move that is closest to you first. Example: If there are 3 Mandragora on Area 3, and one on Area 5, make the move on Area 5 first. If you do not and you move on Area 3, there will then be two mandragora in Area 5 and you will overscore. If you did Area 5 first, there will then be one in Area 5 after moving in Area 3. This will lead to more points for you. Always think ahead on what will happen to the tiles in front of the Area you choose.
To win, remember that you do not need to eliminate every mandy from the board. If either you or your opponent cannot make a move on their round, the game is over and the highest scorer at that point wins. Watch the scoreboard!
A good strategy is to get ahead in points and then play defensively and hoard the mandys on the red tiles where the opponent cannot move them.
Rewards
| Mandragora Mania Rewards | ||||
|---|---|---|---|---|
| Item | Cost | Notes | ||
|
0 Jingly |
| ||
|
|
30 Jingly |
| ||

|
30 Jingly |
| ||

|
30 Jingly |
| ||

|
10 Jingly |
| ||

|
10 Jingly |
| ||

|
10 Jingly |
| ||
|
30 Jingly |
| ||
|
30 Jingly |
| ||
|
30 Jingly |
| ||

|
50 Jingly |
| ||
|
50 Jingly |
| ||
Previous Year Rewards & Statistics
During every year's Vana'versary Event, two moogles appear in town that are not mentioned in the event post on the PlayOnline website. Historically they were part of the Adventurer Appreciation Campaign but in recent years that campaign as been merged together with a new (or recycled) Vana'versary event.
See below for details on these moogles, and be sure to visit them during the Vana'versary.
Statistic Moogle
At the following locations, a Moogle appears during the Vana'versary event.
![]() Southern San d'Oria (J-9) & Northern San d'Oria (D-8)
Southern San d'Oria (J-9) & Northern San d'Oria (D-8)
![]() Bastok Markets (G-8) & Bastok Mines (H-9)
Bastok Markets (G-8) & Bastok Mines (H-9)
![]() Windurst Woods (K-10) & Windurst Waters (north side) (F-5)
Windurst Woods (K-10) & Windurst Waters (north side) (F-5)
This moogle informs you of the following information about your character in the chat log:
- Chat Frequency (Total number of lines written in-game to social channels)
- Conversations with NPCs (Total number of times you initiated a conversation with an NPC)
- Parties Joined
- Alliances Joined
- Battles Fought
- Number of Times KO'd
- Enemies Defeated (Number of times you landed the killing blow on an enemy)
- GMs Calls Made
In addition to the above, since 2016 you can select two of the following free items
NOTE: You CAN pick two of the same item. If they are ![]() Rare, you need to send the item to yourself or another character first. Items in your sent/received delivery box can be obtained again.
Rare, you need to send the item to yourself or another character first. Items in your sent/received delivery box can be obtained again.
 Echad Ring
 Trizek Ring
 Caliber Ring
 Facility Ring
 Leaf Bench
 Astral Cube
 Alliance Shirt
- Synergyzing two Alliance Shirts will make the more useful Alliance Shirt +1
Previous Year Rewards
Starting in 2010, a red treasure chest appears next to the moogle in the following locations.
![]() Southern San d'Oria (I-8)
Southern San d'Oria (I-8)
![]() Bastok Markets (F-8)
Bastok Markets (F-8)
![]() Windurst Waters (north side) (F-9)
Windurst Waters (north side) (F-9)
The treasure chest offers rewards from previous Vana'versary events.
There is no limit on how many items you can choose from this chest.
